


























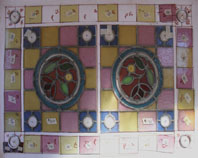
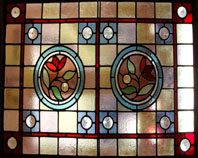

These images show the existing two smaller Panels with their border taken off . They are then placed on a piece of paper to the size of the new leadlight . The lower Image shows the completed Window in situ , with new pieces added to make up the a complete stained glass Panel .
The Client had recently just moved Home , taking with them the original Toplight Panels from their former Home , ( they had been replaced with UPCV Windows
Once stripped of the outer border , I then had to try to match up the Glass for the edging pieces to those of the two Panels. The red border was then taken from the original , with corner sections added to help balance the Design .
The Lead on the old Panels had to be filed down and cleaned at the point where it was to join the new lead , in order that the soldered joint run over both sections , and a secure bond be formed .
Overall the Client was happy with the work , she had a permanent reminder from her former Home . I was quite happy with the overall Panel , managing to integrate the two sections into one without looking too fragmented .


This undertaking involved a property with a large amount of Stained Glass already in their Home. So in this regard there already was a strong visual identity in terms of Glass designs .
The Image above shows the strong use of line and curved elements of the original leaded Glass .
Below is the final design which attempts to replicate the the free-
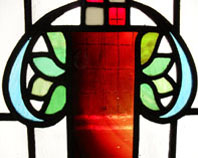
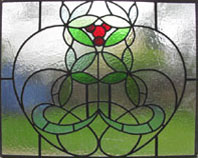
Some of the work we do involves having to change the scale and proportions and scale of a Design , for example we have had to take the design for a sidelight and reconfigure it for a Door . Generally sidelights are tall and slim and Door Panels are much wider . We have also had to transcribe a Toplight Design into a Door Panel .
Mostly the Design skill is to try and make the new work have balance , space and most importantly echo the proportions and colours of the Glass work we are trying to recreate .
